
The only problem...there were not enough colors for me to do 12 frames. But I kept looking and found these desktop frames...

PERFECT! Now all 12 frames could be different colors. Ripping the flap off the back was a bit tricky, but by the time I got to the last one it was easy! The key is use a flat-head screwdriver and pull out the rivets at the top...then the flap slides right off. You don't want to see the first few I did. LOL!
So now I had these perfect frames, but I needed the clock mechanism and some cute vinyl letters. I headed to Etsy and found this...
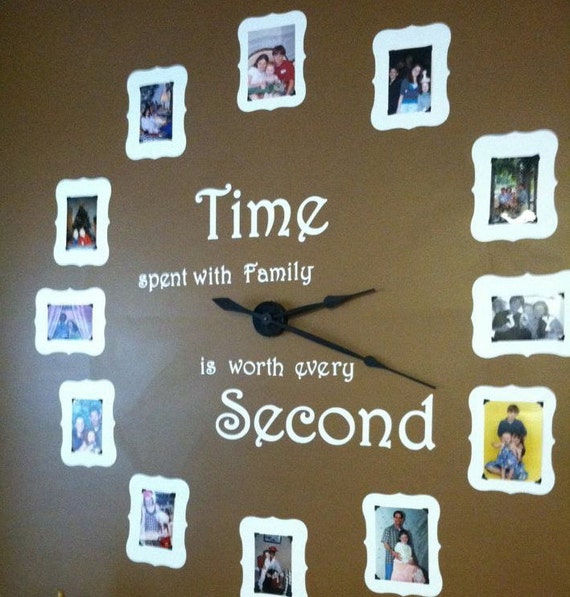
Since I didn't need frames, I asked the seller if I could just buy the clock hands and wording. She made me a special listing. It was GREAT, she even included instructions! Mo is amazing! The vinyl lettering is so easy to apply with her instructions! I love this because your letters are perfectly strait! She now has this same listing in her shop, so go buy it and tell her Jennifer send you!
http://www.etsy.com/listing/160510898/large-wall-clock-kit-lettering-no-frames?ref=shop_home_active
After installing the clock hands on the wall, I used the template Mo provided and hung the frames. I was tired and really just eyeballed it. But I love the final product!!

What do you think? And yes, it keeps perfect time! :)
Feel free to leave comments or ask questions if you need help making your own clock!
I love it! I wish you would come to LA and do mine!
ReplyDeleteWow, so creative diy project.
ReplyDelete